Gizmos
Chromatic Abberations
-
chromatic_abberations()¶ Simulate chromatic abberation lens effects.
The effect is masked by a built-in radial that can be adjusted in softness and scale in the
Effectsection of the UI. By default the mask will ensure that the effect is more pronounced towards the edges of the image than in the centre. This can be overridden by plugging in a custom mask and switchingEffect > Use Mask Inputon.The standard weights will produce magenta/green chromatic abberations but can be tweaked in the
Advanced > Weightssection of the UI.By default, the aspect ratio is
1.0on all channels, this can be tweaked in theAdvanced > Aspect Ratiossection of the UI to get a horizontally/vertically “squished” effect.
Global:
Parameters: Switches:
Parameters: Mask:
Parameters: Advanced > Weights:
Parameters: Advanced > Aspect Ratios:
Parameters: Effect example:
Grade Layer
-
grade_layer()¶ In multi-pass compositing, passes or layers are usually shuffled out, tweaked and re-combined to build the beauty render. For pre-comps or other simple composites however, this might be an overhead and the artist will work directly with the multichannel EXR beauty instead.
This gizmos allows the grading of a specific pass/layer, e.g. Reflection, even if passes have not been shuffled out and the result is being re-composited correctly back into the main beauty. It mirrors the Nuke Grade node, the only addition being the
Layerdrop-down menu from which the artist can select the pass/layer to grade.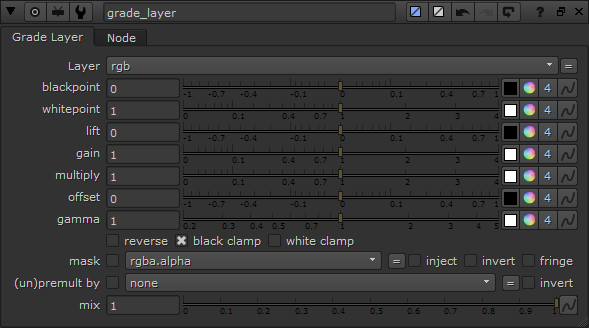
Global:
Parameters: Layer (str) – Pass/Layer to be graded and re-composited, default: rgb
Photoshop Curves
-
photoshop_curves()¶ When co-working with stills retouching teams, mood frames and colour grades might have been done in Photoshop using curves. These curves were therefore applied in
sRGBand not inlinearcolour space as compared to Nuke’s built-inColorLookup.This gizmo wraps a standard Nuke
ColorLookupand performs aColorspaceconversion to and fromsRGBbefore and after so theColorLookupworks almost exactly like Photoshop Curves.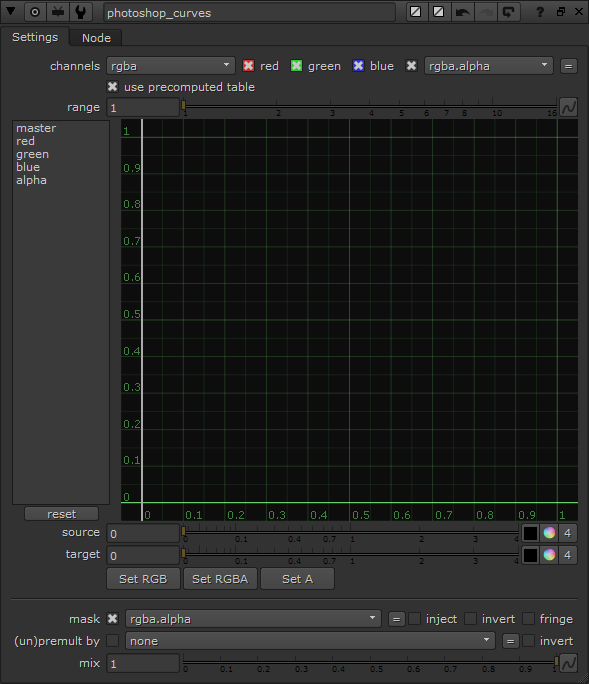
Refraction Diffusion
-
refraction_diffusion()¶ Calculation spectral light effects can be very expensive if calculated in a 3D renderer.
This gimzo simulates a spectral “Refraction Diffusion” effect and requires three separate channels inputs:
- Refraction RGB
- Refraction/IOR vectors with a low IOR, default:
1.0 - Refraction/IOR vectors with a higher (glass-like) IOR, default:
1.5
The Refraction/IOR vector passes can be rendered as a V-Ray SamplerInfo Render Element as described below. Adjust the
Refract IORvalue for each of the Refraction/IOR vector passes.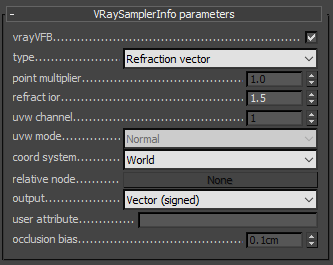
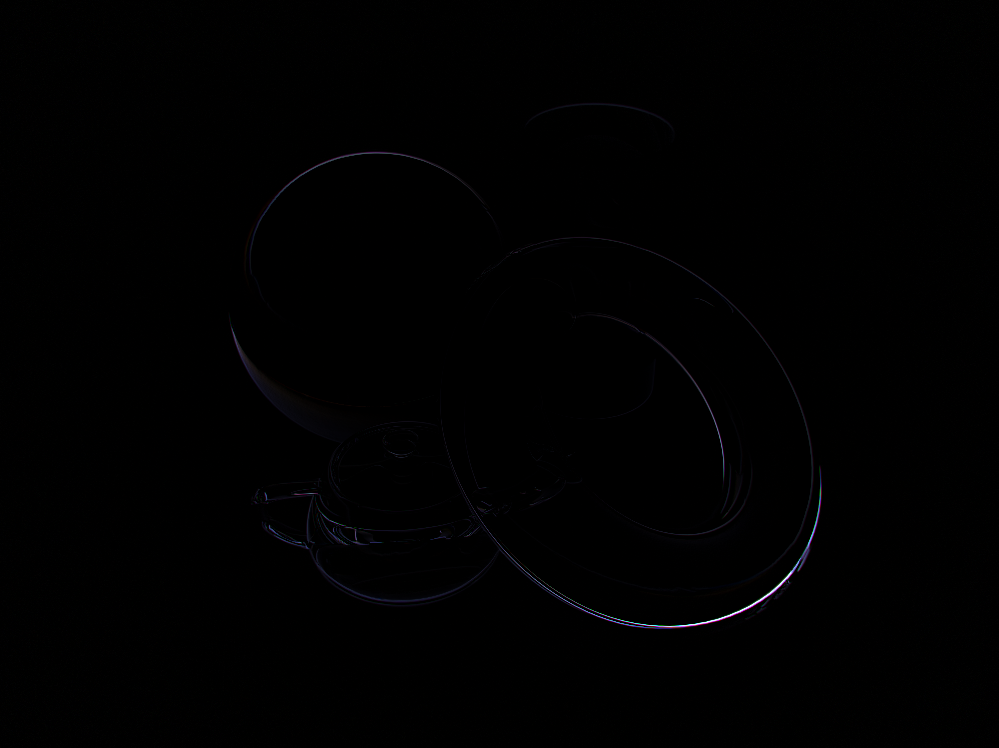
The rendered result should should look roughly like this (IOR
1.0and1.5):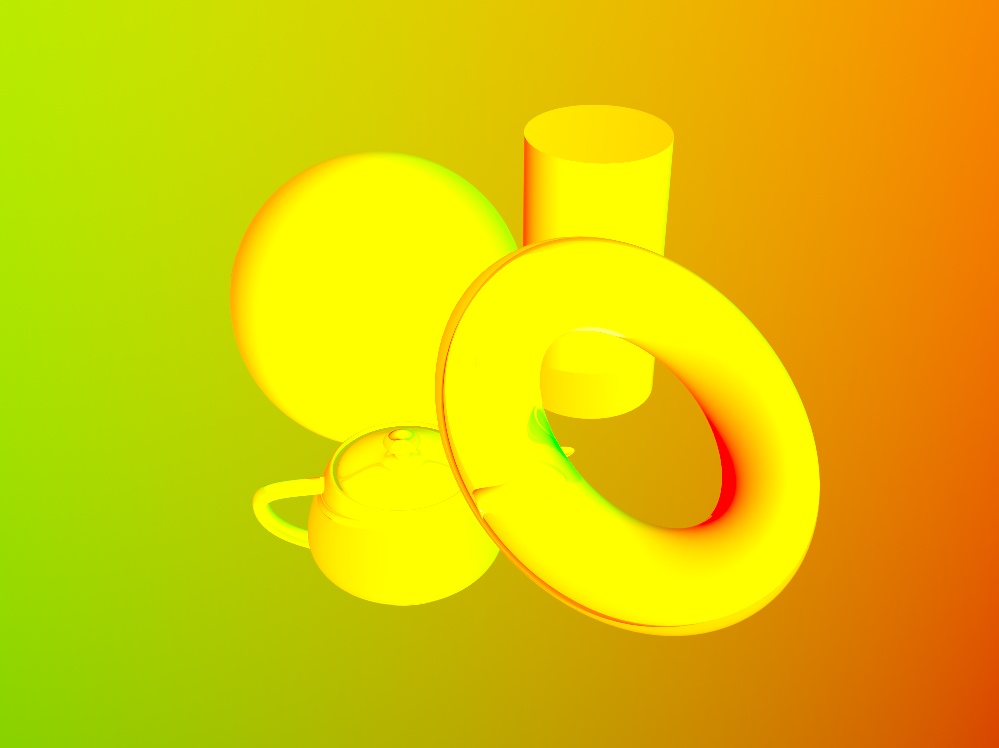

From this the gizmo will calculate a Refraction/IOR mask that is the basis of the effect. The mask can be previewed by toggling the
Preview Maskswitch in the UI: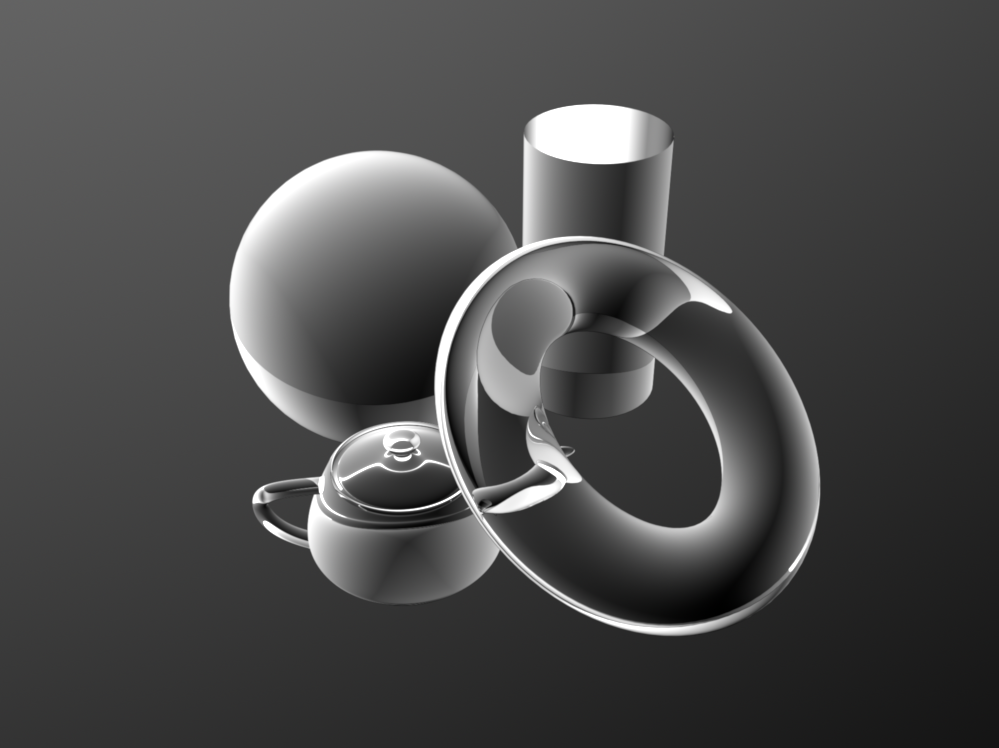
Adjusting the parameters described below will yield results similar to the effect example image at the the end of this section. The effect can be previewed by toggling the
Preview Effectswitch in the UI.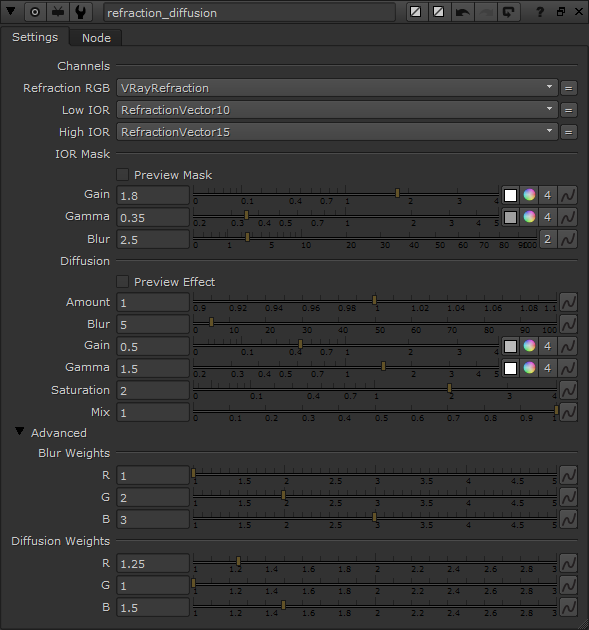
Channels:
Parameters: IOR Mask:
Parameters: Diffusion:
Parameters: - Preview_Effect (bool) – Display the effect only, default:
False - Amount (float) – Overall strength of the effect, i.e. separation of RGB channels, default:
1.0 - Blur (float) – Effect RGB blur in pixels, default:
5.0 - Gain (float) – Effect RGB multiplier, default:
0.5 - Gamma (float) – Effect RGB gamma, default:
1.5 - Saturation (float) – Effect RGB saturation, default:
2.0 - Mix (float) – Effect mix or opacity value, default:
1.0
Advanced > Blur Weights:
Parameters: Advanced > Diffusion Weights:
Parameters: Effect example:

V-Ray Tonemapper
-
vray_tonemapper()¶ This gizmo implements the V-Ray
ReinhardandExponentialtone mappers. Documentation.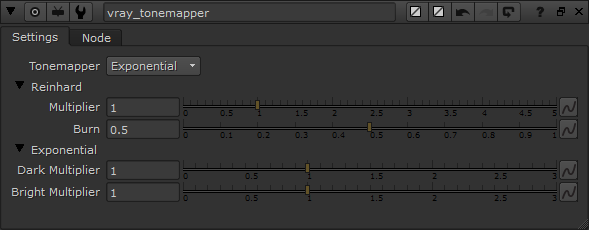
Global:
Parameters: Tonemapper (str) – Tone mapping algorithm to be used Reinhard:
Parameters: - Multiplier (float) – The overall multiplier when the
Tonemapperis set toReinhard. - Burn (float) – Adjusts the blend of mapping between linear and exponential style for the
Reinhardtone mapper. If Burn Value is1.0, the result is linear color mapping; if Burn Value is0.0, the result is exponential-style mapping.
Exponential:
Parameters: - Multiplier (float) – The overall multiplier when the